
How to Make Adorable Tie-Dye Zipper Bags
There’s something incredibly satisfying about turning plain fabric into colorful, one-of-a-kind creations—and these tie-dye zipper bags are no exception. Whether you’re making them for gifts, organizing supplies, or just for fun, this project is beginner-friendly and super customizable.
In this post, I’ll walk you through the exact process I used to create these soft, vibrant bags—from scrunching and tying to dyeing and revealing those beautiful patterns.
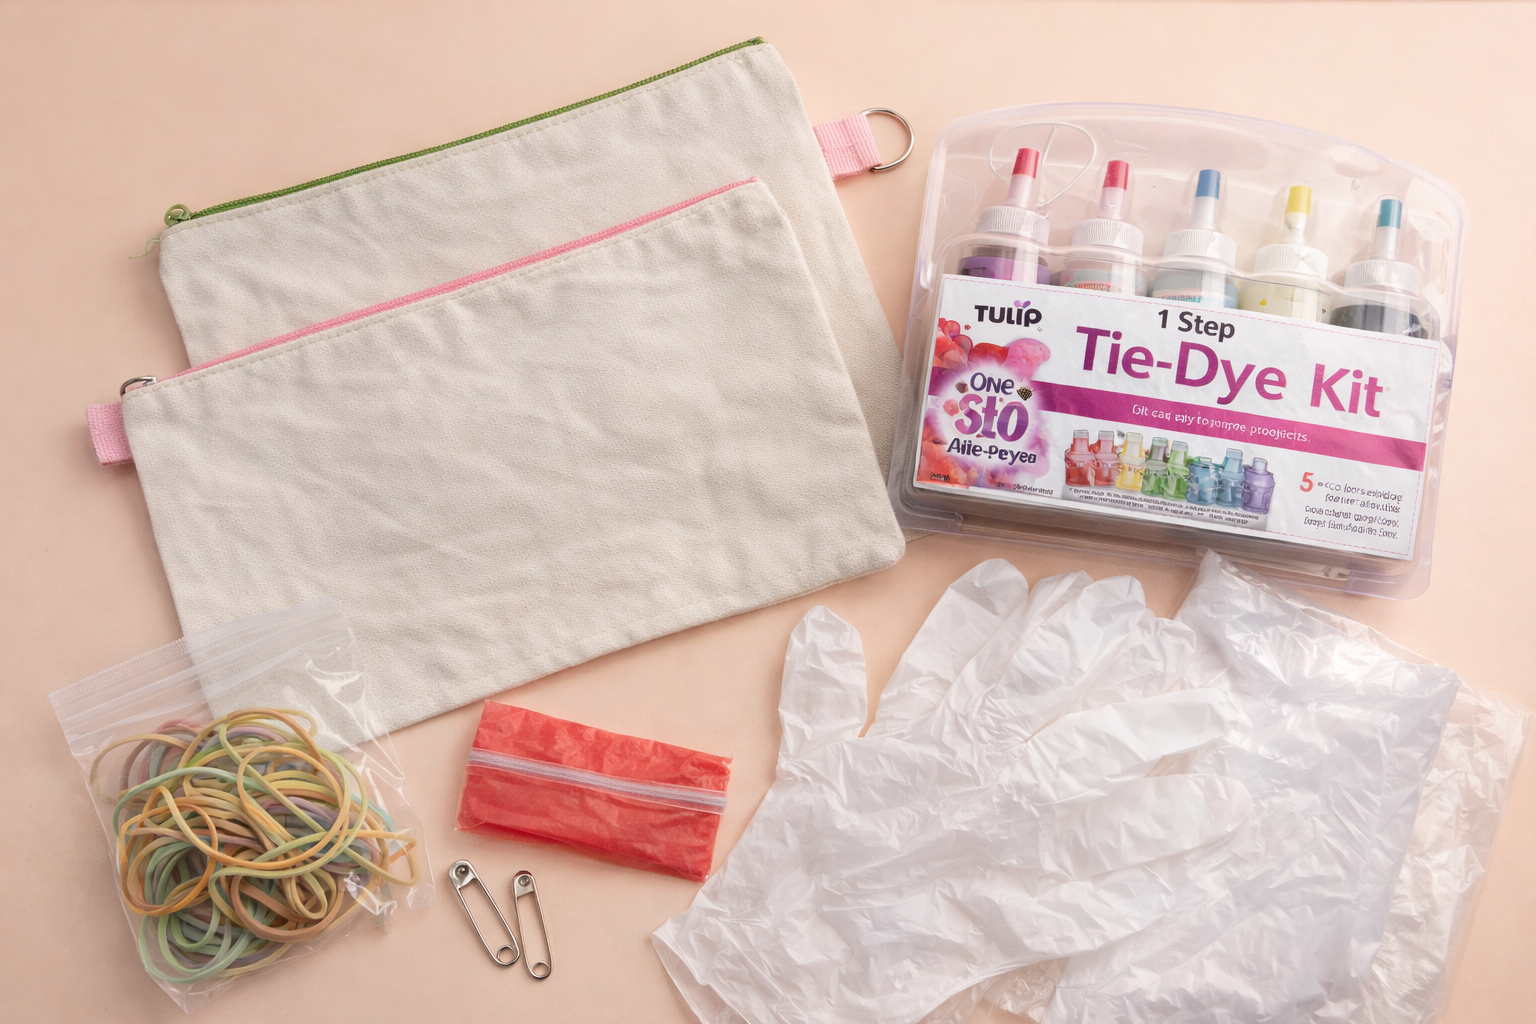
Materials You’ll Need
Here are the basics to get started:
Canvas zipper bags (cotton works best)
Example: https://www.amazon.com/dp/B07QX8X9XHFabric dye (like Tulip One-Step Tie-Dye Kits)
https://www.amazon.com/dp/B001J2PHH6Rubber bands (various sizes)
https://www.amazon.com/dp/B08L5V5Y6MPlastic squeeze bottles (if not included in kit)
Gloves (to protect your hands)
Plastic table cover or trash bags (for mess-free workspace)
Paper towels or old towels
Zip-top bags or plastic wrap (for setting the dye)
Optional but helpful:
Safety pins or clips (to create different resist patterns)
Spray bottle with water (for dampening fabric)

Step-by-Step Directions
1. Prep Your Bags
Start with clean, damp canvas bags. If they’re brand new, it helps to wash them first to remove any coatings that might prevent dye absorption.
Lightly dampen the bags—this helps the dye spread more smoothly.
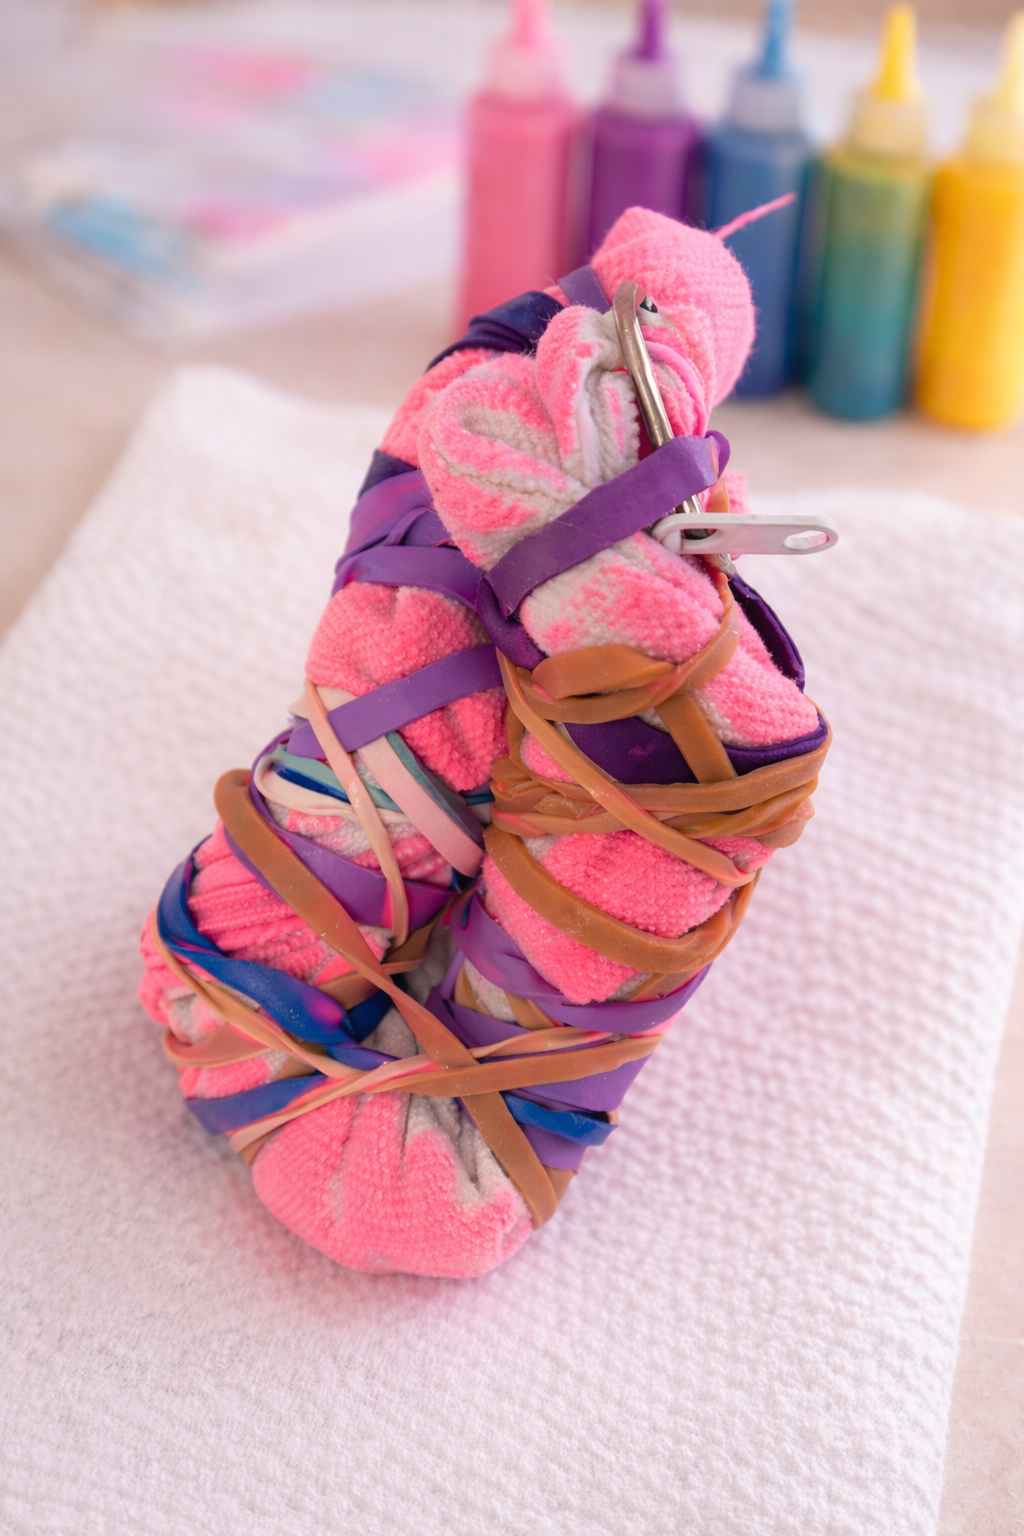
2. Scrunch and Tie
This is where the magic begins!
Lay your bag flat
Scrunch it randomly from the center or one corner
Keep gathering until it forms a tight bundle
Secure it with multiple rubber bands in different directions
*Tip: The tighter the rubber bands, the more white space and defined patterns you’ll get.
You can also experiment:
Fold in an accordion style for stripes
Twist into a spiral for a swirl effect
Add safety pins or clips for unique shapes
3. Apply the Dye
Put on your gloves and get your dyes ready.
Apply dye directly onto different sections of the scrunched bag
Rotate the bundle to cover all sides
Use multiple colors for a vibrant look—or stick to 1–2 for a softer palette
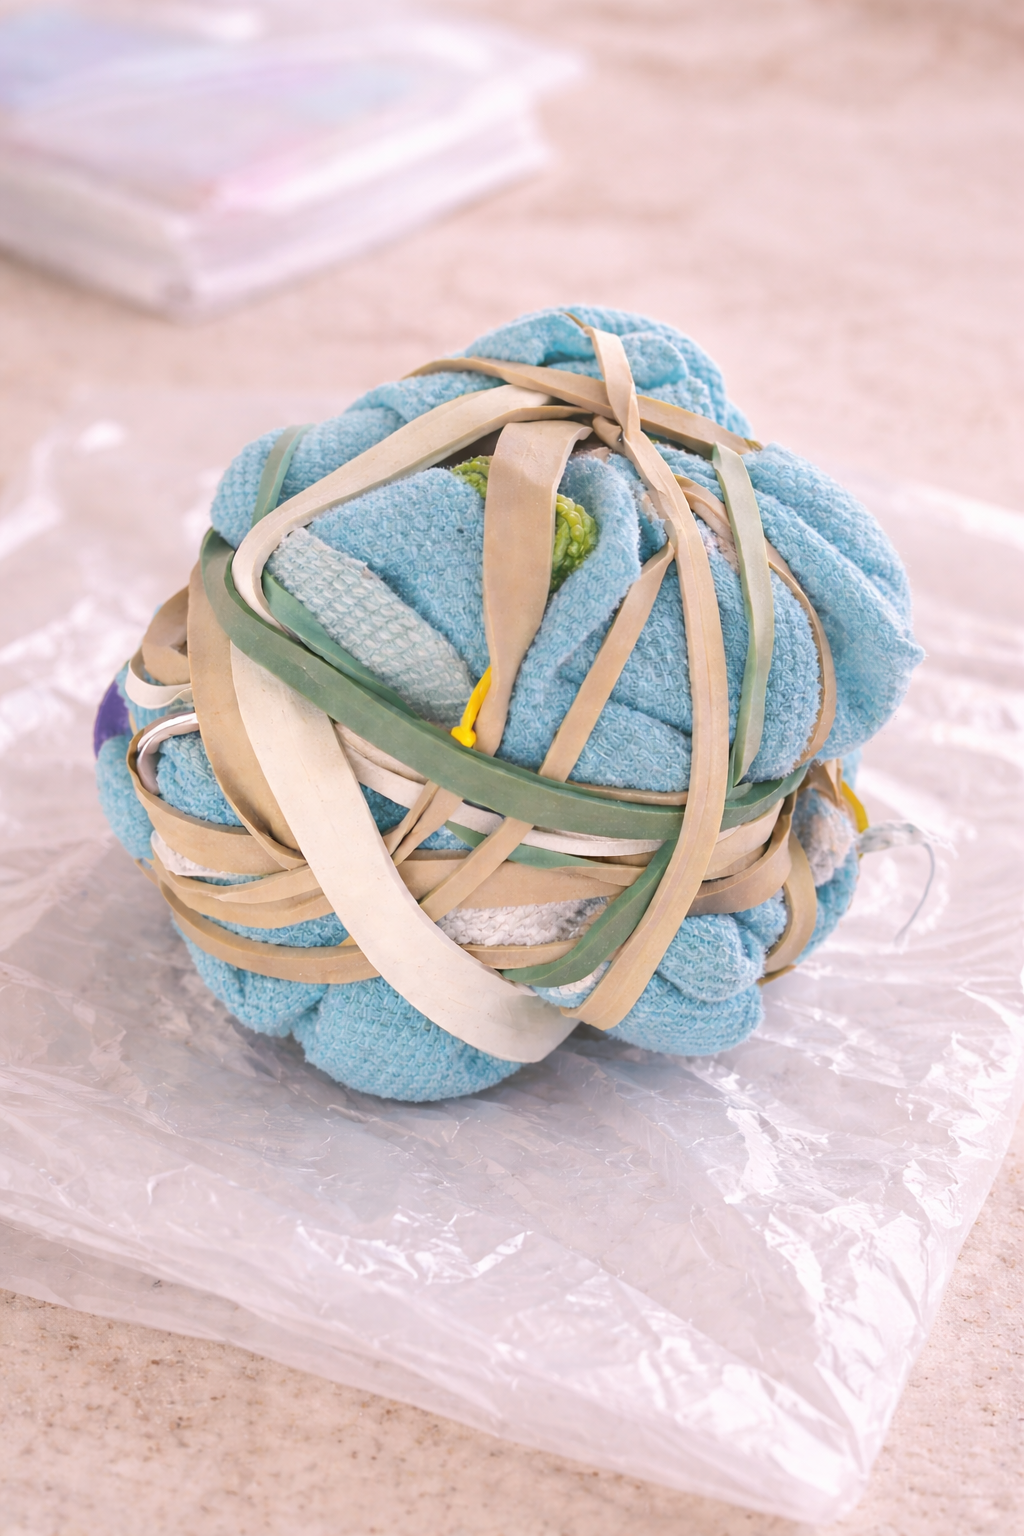
* Try not to oversaturate—unless you want colors to blend more.
4. Let It Set
Once dyed:
Place each bag into a zip-top bag or wrap in plastic
Let it sit for 6–24 hours
The longer it sits, the deeper and richer the colors will be.
5. Rinse and Reveal
This is the best part!
Remove rubber bands carefully
Rinse the bag under cold water until the water runs mostly clear
Then wash separately in warm water with mild detergent
Let air dry
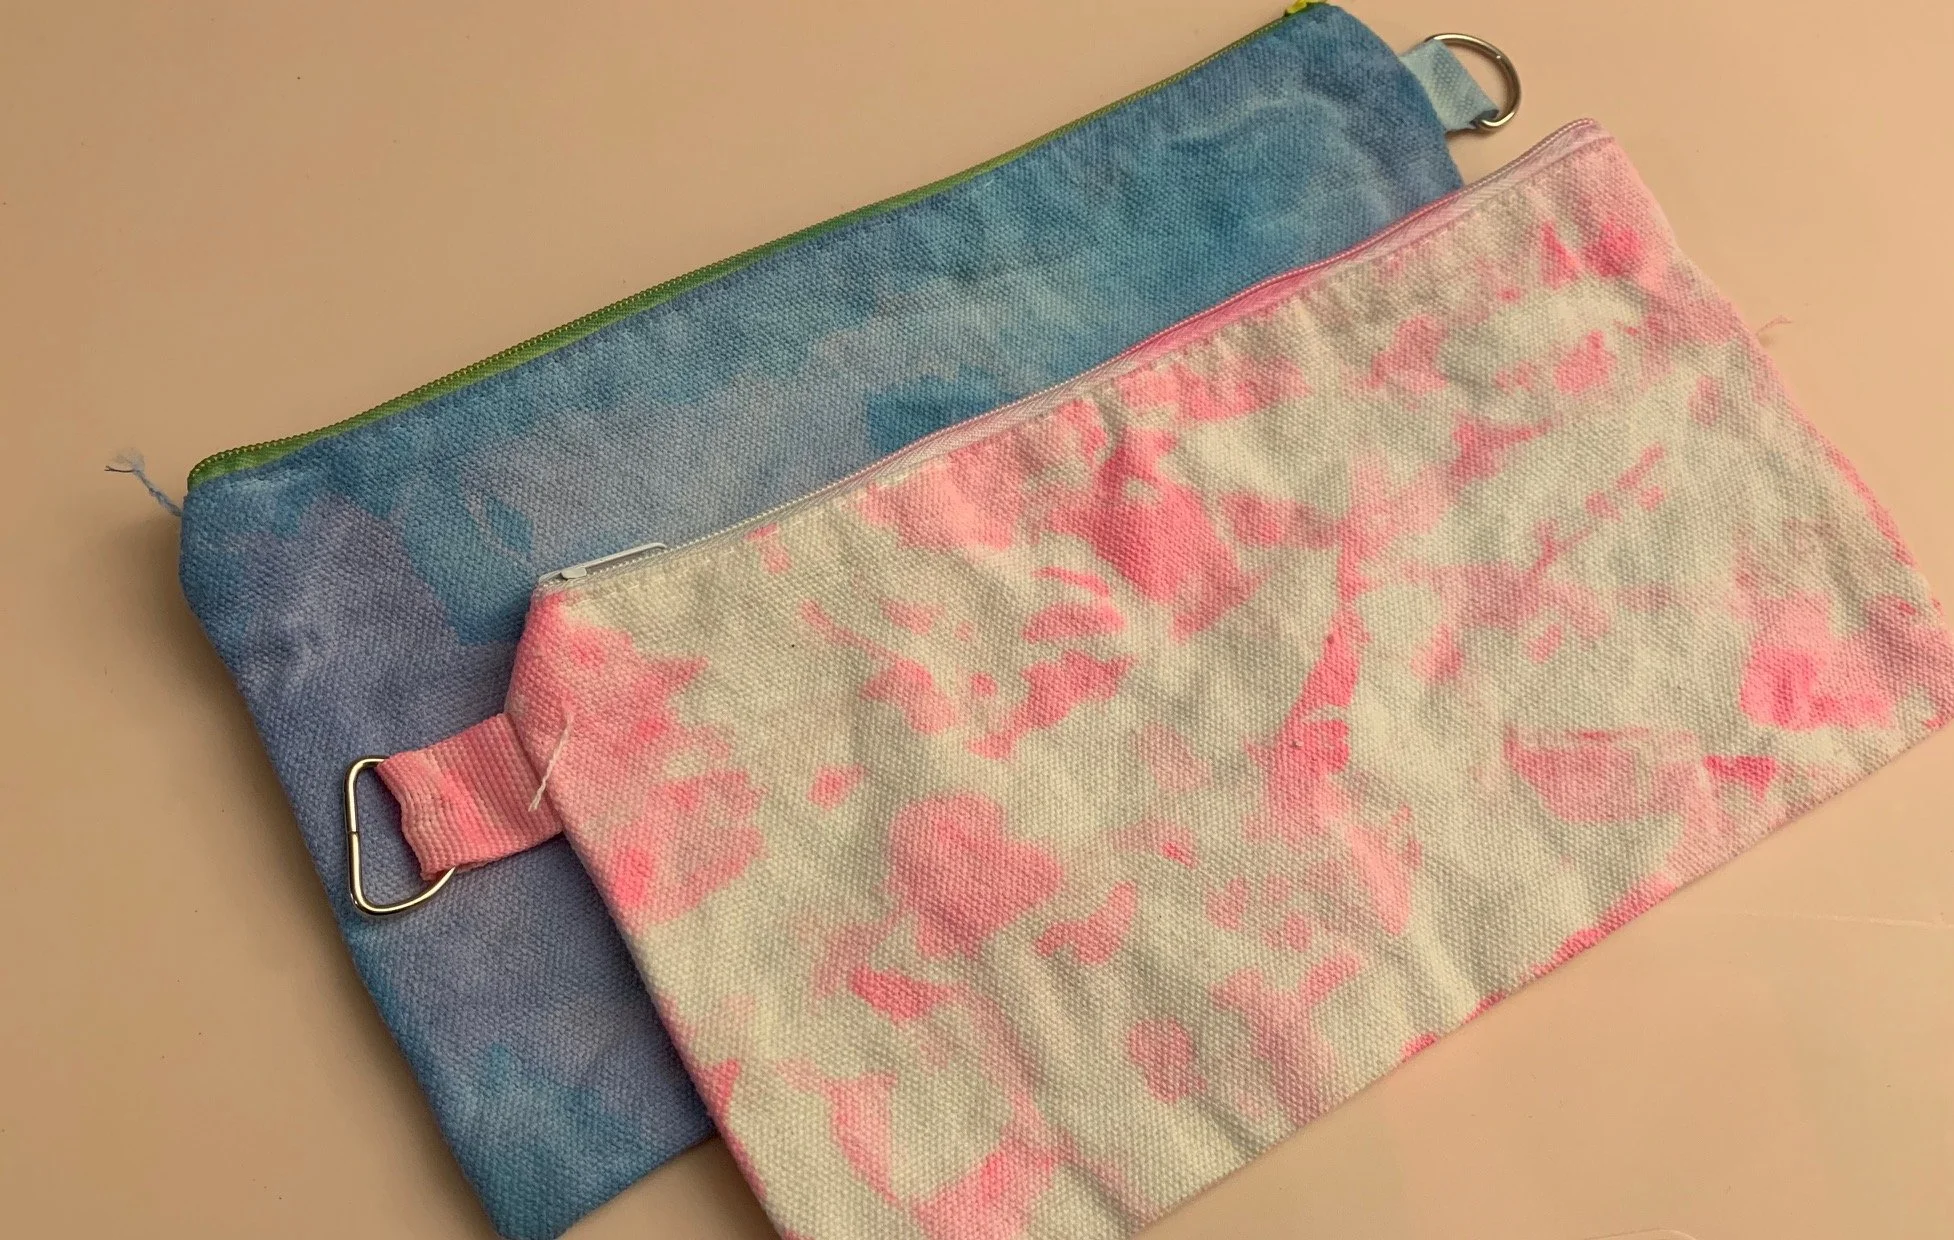
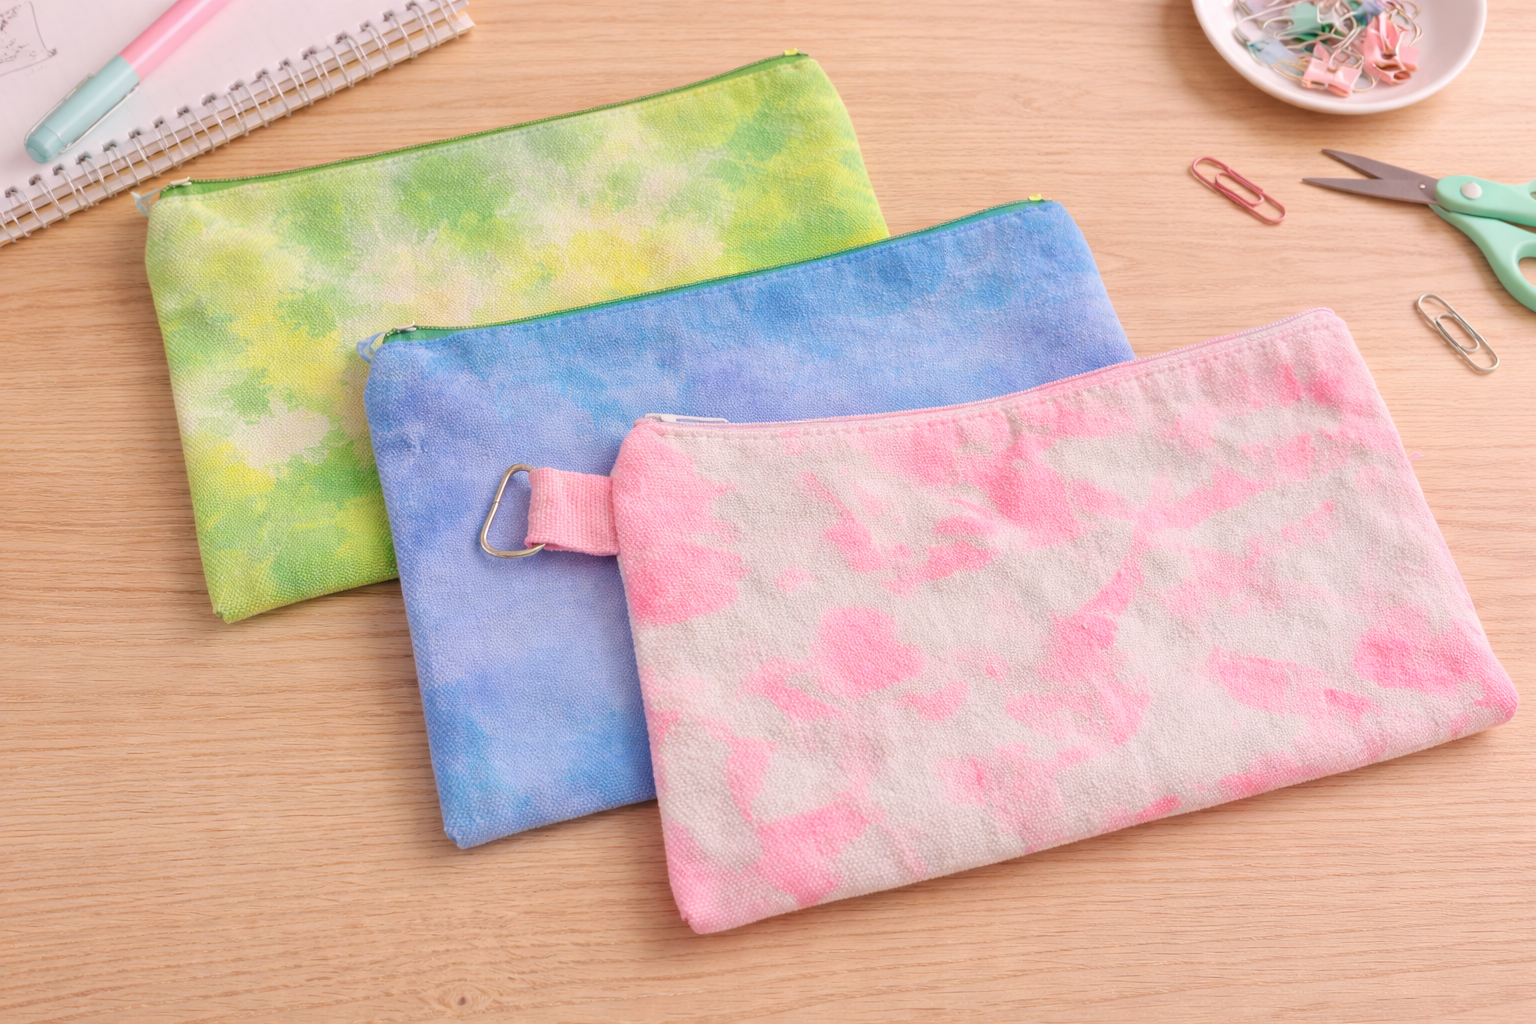
Each bag comes out completely unique—some with bold bursts of color, others with soft, marbled patterns. The texture of the canvas adds an extra dimension, making them look even more artistic.
These are perfect for:
Pencil pouches
Makeup bags
Travel organizers
Handmade gifts
Tips for Success
Stick with 100% cotton for best dye results
Protect your workspace—dye stains!
Don’t overthink the folding—random patterns often look the coolest
Make several at once for a fun batch project